
CAPTURE Image and Deploy Image using WDS
Why Capture and Deploy Images Matter in the MCSA Journey
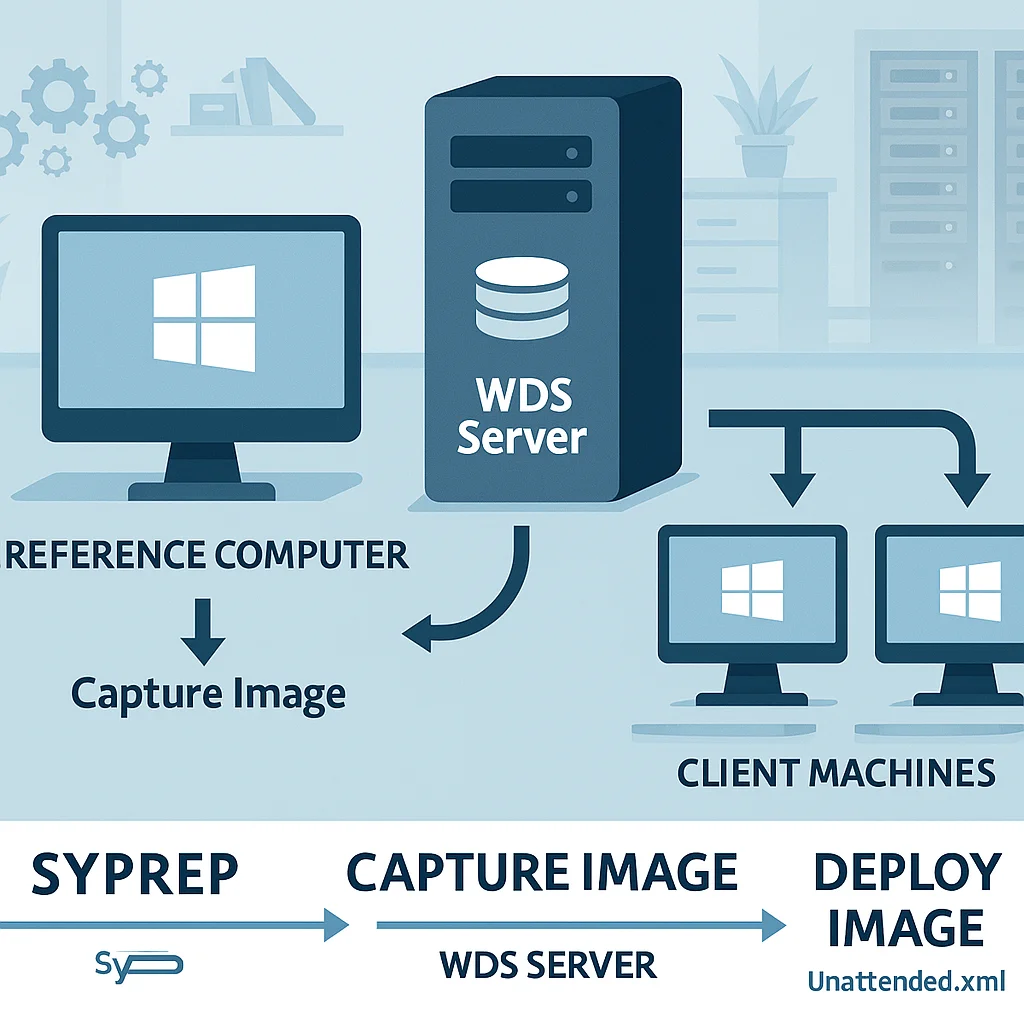
In the world of system administration, speed, consistency, and repeatability are the trifecta of success. For aspiring IT professionals pursuing the MCSA course, mastering capture and deployment of Windows images is a fundamental skill. This guide – inspired by a practical Day-25 module – walks you through the core concepts and hands-on steps to capture a clean Windows image, prepare it with Sysprep, and deploy it across multiple machines using Windows Deployment Services (WDS).
Whether you’re a beginner or an experienced admin, you’ll find actionable, safe, and repeatable techniques you can apply in real-world environments.
By the end of this post, you’ll understand how to create a pristine reference image, automate as much as possible with unattended deployment files, test deployments in a controlled environment, and manage your imaging library for scalable software and OS provisioning.
Prerequisites: What You Need Before You Start
- Windows Server with the Windows Deployment Services role installed and configured
- A reference PC where Windows is installed and customized (you can install VLC or other apps if needed for your test image)
- Sysprep tooling and an understanding of the Generalize and OOBE phases
- An unattended answer file (unattend.xml) prepared for automated installation, and a testing VM or physical machine to validate the capture and deployment process
- Access to a shared capture repository on your WDS server, including a suitable naming convention for images (e.g., Windows 11 HR, Windows 11 Pro, etc.)
Important note: Always test imaging workflows in a controlled lab environment before applying them to production. Unattended deployments can automate steps that otherwise require manual input, so it’s essential to validate every setting and choice in a safe space.
Main Body: A Practical Workflow for Capture and Deploy
1) Build a Clean Reference Image

Start with a clean Windows installation on a reference machine. Install only what you need for your base image, and optionally add software that must be present on all target systems (for example, core management tools or a standard media player). The goal is to have a consistent baseline that you can generalize and deploy across devices.
2) Prepare the Image with Sysprep
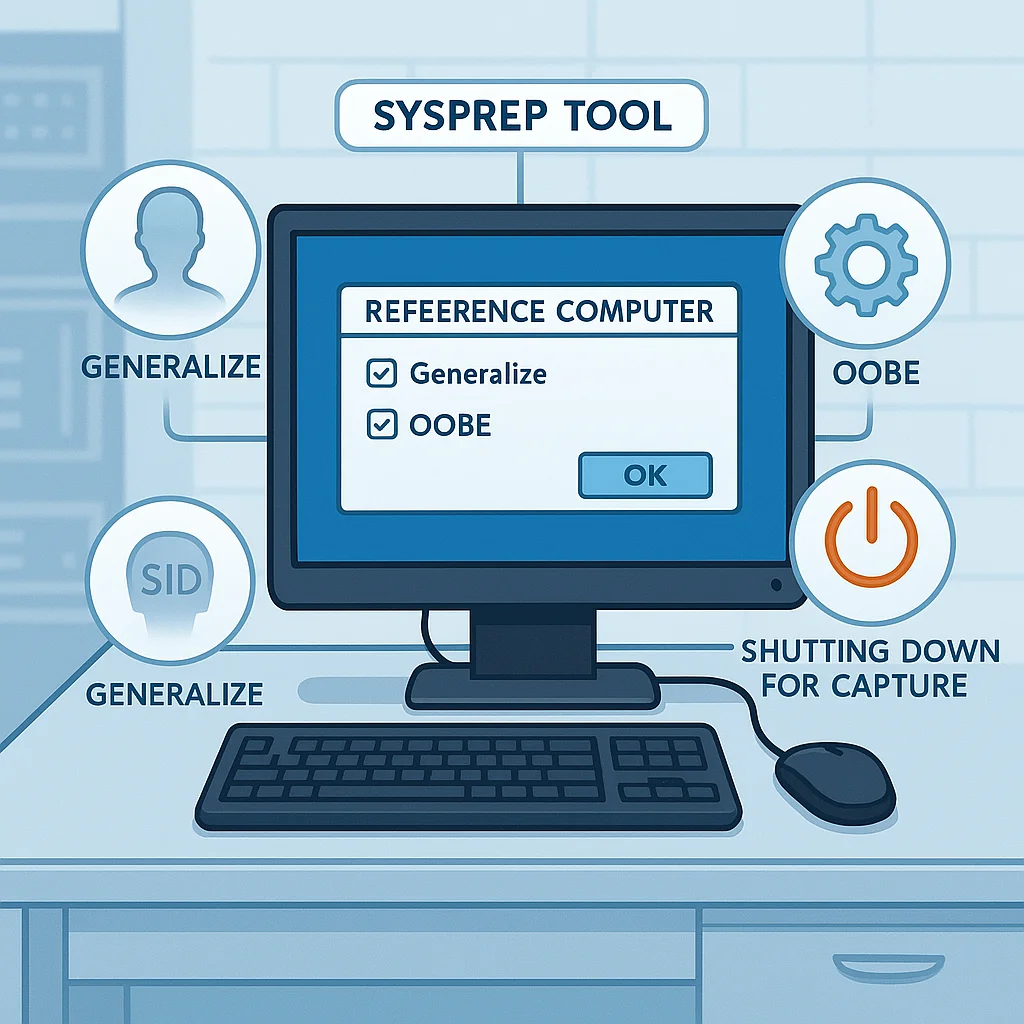
Sysprep is Windows’ built-in tool that generalizes a system image. Generalizing removes system-specific data (like SID) so the image can be deployed to many machines while still booting into a first-run setup experience. The typical steps are to initiate a Sysprep run with the Generalize and OOBE options, then shut down the machine to prepare the image for capture. This process creates a pristine baseline that you will capture as a WDS capture image.
3) Create a Capture Image on the WDS Server
On the WDS server, use the Deployment Services console to create a capture image. The workflow usually looks like this:
- Initiate a new capture image under the WDS console
- Name the image (for example, Windows 11 HR Capture) and specify where to store it on the server
- Proceed through the prompts to create the capture image. This image will boot the reference machine into a special capture environment and save the final captured image back to the server
During this step, you’ll often be asked to select the volume to capture (commonly the C: drive). Ensure you choose the correct volume that contains the OS, and give the image a clear, descriptive name to distinguish it from other captures.
4) Boot to the Capture Image and Capture the Reference Image
Boot the reference machine using a network boot (PXE) and select the capture image you created. The capture session will copy the configured OS image to the designated repository on the WDS server. Once the capture completes, you’ll have a reusable, generalized Windows image ready for deployment.
5) Create a Deployment Image (Unattended Deployment)
With your capture image ready, the next step is to set up an unattended deployment for future machines. This involves:
- Configuring an unattended response file (unattend.xml) to automate the Windows setup steps (locale, product key prompts, account creation, network settings, etc.)
- Linking the unattended file to the image in the WDS server so deployments run automatically without manual input
- Optionally restricting the deployment to specific architectures (e.g., 64-bit) and configuring domain join settings if your environment requires it
In practice, you’ll often manage these settings through the WDS console, the Deployment Workbench, and related UI elements. The unattended file ensures a consistent user experience across machines and speeds up large-scale provisioning.
6) Test the Unattended Deployment with a Virtual or Physical Machine
Create a test VM or use a spare PC to validate the unattended deployment. Ensure the target VM can boot from the network, select the Windows image, and complete the install automatically using the linked unattend.xml. During testing you’ll confirm:
- The OS boots into the expected OOBE/setup flow
- Domain join (if configured) works automatically
- Pre-installed apps (e.g., VLC) appear as expected in the image
7) Managing Image Groups, Permissions, and Access
In WDS, you can organize images into groups (for example, HR, IT, or Development) and control who can access and deploy each image. Use groups to prevent confusion when you have multiple images and ensure only the intended image is offered during PXE boot. Permissions and approvals may be required for production deployments, depending on your organizational policies.
8) Domain Join and Automation
One of the biggest benefits of a well-configured unattended deployment is automatic domain joining. After deployment, the new machine can automatically log in with a domain account or be added to the domain as part of the install sequence. This reduces post-deployment work and speeds up large-scale rollouts.
Best Practices and Practical Tips
- Document naming conventions for images, groups, and deployments to keep your library clean and searchable
- Maintain separate images for department-specific software or configurations, so you don’t carry unnecessary software into every machine
- Test frequently in a controlled lab, including both clean installations and domain-joined scenarios
- Back up critical configurations and document the unattended file mapping to avoid misconfigurations during deployment
- Limit sensitive information in the unattended file and use domain-based accounts with the minimum required privileges for deployment tasks
Troubleshooting Common Scenarios
If your PXE boot isn’t offering the expected images, check the following:
- Ensure the capture and boot images are correctly published on the WDS server and that the target machine is booting from the network adapter first
- Verify the unattended file path and references in the deployment share. A misconfigured path or incorrect file name can derail automated installations
- Confirm domain join credentials are valid and that the domain controller is reachable during deployment
When you encounter a failure, use the Pending Devices section on the web server to approve or adjust deployments. This ensures devices proceed through the automation pipeline without manual intervention.
Conclusion: Accelerate IT Automation with Captured Images
Capturing and deploying Windows images via Windows Deployment Services, Sysprep, and unattended installation files is a transformative capability for IT teams. It enables consistent, scalable, and hands-off provisioning that saves time, reduces human error, and supports rapid deployment across organizations. By building a clean reference image, generalizing it with Sysprep, capturing it, and then deploying with unattended files, you create a repeatable workflow that aligns with modern IT operations and the MCSA skill set.
Ready to see this in action? Subscribe to our YouTube channel for step-by-step video tutorials and practical demos. And as always, we’d love to hear your thoughts: What aspects of capture and deploy would you like to explore further? Share your questions in the comments below and we’ll tailor future guides to your needs.
Call to Action
If you found this guide helpful, don’t miss out on future tutorials. Subscribe to our YouTube channel for new videos on MCSA topics, and follow IT4U for more hands-on labs, checklists, and practical deployment strategies. Have feedback or a topic you want covered? Leave a comment below or email us at su*****@**4u.in. Let’s keep learning together!
Pro Tips – Mastering Capture and Deployment
- Always maintain a clean reference machine: The cleaner the base image, the fewer issues during deployment. Avoid leftover trial software or personal data.
- Use meaningful image names and versioning: For example,
Windows11_HR_v1.0orWindows11_IT_June2025. This helps track updates and rollback if needed. - Separate images for departments: Keep department-specific apps in separate images to reduce unnecessary software bloat.
- Regularly update your images: Apply Windows updates, security patches, and software updates to your reference images every few months or after major releases.
- Document your unattended files: Keep a mapping of which unattend.xml is linked to which image. This avoids deployment mistakes.
- Test every deployment in a lab first: Use virtual machines or spare PCs to confirm the image deploys correctly, including domain join, apps, and settings.
- Limit sensitive information in unattended files: Use accounts with minimum privileges required for deployment, and avoid embedding passwords in plain text.
- Monitor PXE and WDS logs: They are invaluable when troubleshooting boot or deployment failures.
FAQ – Capture and Deploy Windows Images
Q1: What is the difference between a capture image and a deployment image in WDS?
A: A capture image is used to capture a reference machine’s Windows installation and save it to the WDS server. A deployment image (or install image) is used to deploy that captured image to multiple target machines, often with an unattended answer file for automation.
Q2: Can I capture a Windows image from a physical machine and deploy it to a virtual machine?
A: Yes. As long as the reference image is generalized with Sysprep, it can be deployed to both physical and virtual machines. Make sure hardware-specific drivers are handled appropriately for target systems.
Q3: Do I need to install all software before capturing an image?
A: Only install software that should be standard on all deployed machines. Avoid unnecessary applications to keep the image lean and reduce post-deployment maintenance.
Q4: What happens if I forget to run Sysprep before capturing an image?
A: If Sysprep is not run, the image will retain system-specific information like SIDs, which can cause conflicts, activation issues, or domain join failures when deployed to multiple machines. Always generalize the image first.
Q5: How do I test my unattended deployment before using it in production?
A: Use a virtual machine or a spare test PC to deploy the image with the linked unattend.xml. Confirm that:
- Windows completes setup automatically
- Domain join works (if configured)
- Pre-installed apps appear as expected
Q6: Can I have multiple capture images for different departments?
A: Absolutely. WDS allows you to organize images into groups, e.g., HR, IT, Development. This prevents confusion and ensures each department gets only the software/configuration they need.
Q7: My PXE boot is not showing the images. What should I check?
A: Check the following:
- Ensure boot and capture images are published on the WDS server
- Confirm the target machine is booting from the network first
- Verify the unattend.xml path and file name are correct
- Check domain join credentials and network connectivity
Q8: How often should I update my reference images?
A: Update images whenever there are:
- Windows updates or patches
- New standard software versions
- Configuration changes for departments
Tip: Keep a version history of images for rollback or testing purposes.


Add comment